Sunday, September 08, 2013

So many projects, so little time.....to blog

Where has all the time gone? It seems like I just posted something here yesterday and yet the last time I was here was August 24.

That doesn't mean I haven't been working on anything.  As a matter of fact, this post is very picture heavy (just a warning lol)

I am still in my Fall/Halloween mood. I just love the colors!!! But I have a couple other, non-autumn related items this week too.  :-)

To say I have been working on tons of stuff is an understatement. I even have a few things still on my camera.

Let's start with fun new ideas...
I saw this on Pinterest while looking for some Cuttlebug ideas. Using aluminum tape, you can created really cool backgrounds. I found this 50 foot roll of tape in with the duct work supplies at Home Depot. It cost around $8. I already have a great idea for my Christmas cards using this for the background (hope it turns out as great as I imagine lol)
I found that if I put the tape onto cardstock first, it was much more stable and easier to work with on my cards (but you can run just the tape through the Cuttlebug and it embosses just fine). I used plain index cards for the backing....cheap and an easy size to work with.
You can see that I was also playing with alcohol inks. :-)  I found that you can apply the alcohol inks before embossing like above or apply after embossing to just highlight the raised areas (but this was much more time consuming....still looks cool though)

So, after experimenting, I was ready to use this on a card. I put 2 strips of the aluminum tape onto an index card. I covered it with alcohol inks (a blend of reds, browns and golds...which don't show up too well in a photo because it is so shiny) then ran it through the Cuttlebug using the Fall Leaf background from Darice. The stamped image is from the Stampin' Up set Halloween Smiles.

And while playing around with the Cuttlebug, I pulled out my Jack o Lantern folder (part of the Happy Hauntings set) and tried applying ink to the embossed images.
I love how it turned out. This is Spiced Marmalade Distress Ink. I just rubbed the ink pad gently over the paper so the ink only hit the raised images. My only problem? I is just too bright and busy to work as a background with anything I have tried. So it is sitting in my stack of leftovers until I find a good match.
I used this folder again to make the background for a friend's birthday card (she is a Halloween baby)
I made the cupcake in fall colors and of course, chocolate icing lol The cupcake comes from Simply Charmed. I added shading with Prismacolor pencils.

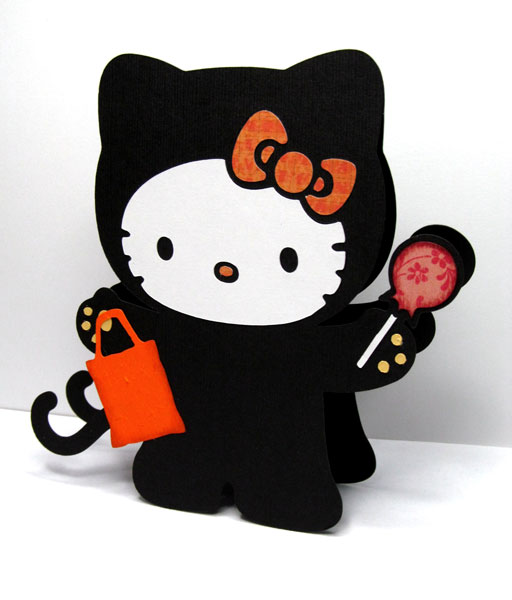
And since I was still in Halloween mode, I pulled out the Teddy Bear Parade cartridge and made this little witch.
But then I couldn't decide what to do with her so she hung out on my desk until I put her on this doorknob tag. The spider web and 'Trick or Treat' are from October 31st.

But we are not done yet my friends.....I warned you that I was super busy! lol

I saw several ideas for Post-it note holders online and thought that might make a cute gift. I grabbed my Create a Critter and Teddy Bear Parade. I removed the eyes and mouth cuts from the worm using the Cricut Craft Room and resized him just a bit to fit my project better. His glasses are from Teddy Bear Parade, resized to fit his little head.
This paper was printed with the eyelet and striped edge. Since this was a practice project, I didn't want to get into layering papers and such. I just wanted to get my basic measurements down.
I used the standard 3x3 post-it. I cut the background paper at 3 1/4" x 6 3/4" so that I have about 1/8" edge around the post-it. It went together really fast. I think I might be tossing a few of these into my Christmas boxes.  :-)

I was able to leave the Cricut and Cuttlebug alone for a while this week :-)
I moved into tag mode.

This is what happens when I am bored and start watching Tim Holtz videos lol Using the technique where you rub your distress inks onto a non-stick craft sheet (or in my case a piece of foil) spritz with water and then rub your tag into the puddles....I got this.

The bumpy stuff down the right side is some sort of gel medium with glass beads in it. The stuff was so old that it had thickened to a very stiff mess but I rubbed some on...this was as smooth as I could get it....before I dipped the tag in inks. I had also added a couple lines with crayon knowing they would resist the ink.
I used some stencils and rubber stamps to add more visual texture (notice blue blotches in the upper left...giraffe spots I think. And faint trees in the center left)

This sat on my desk for a couple days until I added more images and added it to my art journal.
But this was not the only tag I inked up that day! I actually did 5 or 6.  Some have not yet been used. Others on waiting to be downloaded off the camera. :-)

I did manage to get one of them photographed AND downloaded lol

Again, using Distress Inks for the background, I added lots of stamped images. The birds and clock face are from Tim Holtz. The pumpkin is from Inkadinkado and the tree branch is actually just one branch from a very large tree stamp from Stampa Rosa.

I added eyelets and jute to the bottom left. The stars are brads. They were shiny silver and copper but I inked them with alcohol inks to make them dark.

Don't you love how it 'glows'? That is the Distress Inks and the Prismacolor pencils in his eyes. They are both products with rich, intense colors.

I guess I have bombarded you with enough this week! lol
Stay tuned for more of my Fall/Halloween goodness!  Be forewarned, I am trying to put together an Autumn Junk Journal lol

Happy Fall Y'all


Saturday, August 24, 2013

Is it Autumn yet?

Summer has to be my least favorite season. Yes, we have flowers but they come with pollen! And we have vegetable gardens, which I love, but they are a lot of work and mine did not grow well at all this year. And the heat! Yuk!

I am an Autumn person. I love the weather, the colors and the PUMPKINS! I am anxiously awaiting fall!!!  :-)

I didn't have a whole lot of crafting time this week but what I did have I made the most of...

Last Saturday evening, while hubby was grilling dinner, I wanted to see if I could whip up a little something.
I grabbed my Simply Charmed cartridge and some scrap paper and made this little guy. He is cut at 2 1/2 inches and shaded with chalks.


And since hubby wasn't quite ready to serve dinner, I headed back into my play art room and made him a tag to live on. This was cut from Tags, Bags, Boxes and More at 3 1/2 inches and 'aged' with distress inks. I typed up the text with Word and cut it with decorative scissors.


Isn't he cute? I am thinking I might send it to my mom to use as a bookmark as she randomly tells me she is craving a cupcake.....although looking at one all the time might not help that problem lol

Sunday morning as hubby was cooking breakfast (no he doesn't do all the cooking lol) I stamped this fellow from the Happy Fall Y'all Stampin' Up set, colored him with Prismacolor pencils and then inked up the 6" tag with distress inks.


I had to wait until later in the week before I had time to work on this again.
I ran the tag through my Cuttlebug using Tim Holtz Texture Fades folder called Sheet Music. I then rubbed distress ink on the embossing to make it show up more. And finally mounted the tag on some paper that looked like peeling paint.


A couple days later I headed back to my Cricut.  :-) I was in the mood to make an ATC. I used Create a Critter for the adorable panda and stamped the bamboo with a stamp from VivaLasVegas Stamps.


And finally, this morning, I made my Thanksgiving cards! I told you I made the most of what little time I had lol

This dapper turkey also comes from the Create A Critter cartridge cut at 2 inches. He is shaded with chalks and mounted on a background that I embossed with Cuttlebug's Autumn Type folder. The 'gobble' was resized a bit in the Cricut Craft Room before cutting.


Just another little project that I threw together one evening.....Hubby saw me browsing through the Teddy Bear Parade leaflet and thought I needed to make a bear with a camera. There is a bear on that cartridge that has a camera but he is dressed for a Hawaiian vacation. I mixed and matched the clothes (a great feature about this cartridge), switching out his shirt for a plain one, adding a baseball cap and glasses. Now he looks just like my hubby....who collects and restores vintage cameras and is NEVER seen without a baseball cap lol


I hope you all have a wonderful week!
I am already thinking about Christmas cards!!!! And Pumpkins! lol


Saturday, August 17, 2013

Brrring Brrrring

Boy what a week! The longest 5 (but felt like 15) days I have had in a long time!!! Yuk!

Needless to say, although I wanted to get in my art room and play, that just didn't happen.

And then today, hubby wakes me up at 5:30am!!!  He had to go to work and I guess felt like if he had to be up so did I.

Once he left for work (at 6:45) I got busy.

I had been wanting to make a little card for a dear friend that I haven't talked to in several months. Just a little 'how ya doin' card.

Here is what I came up with.


The phone is on the From My Kitchen cartridge. I love all the retro items on that cart!
The background shape is from Pink Journey.

I used my art chalks to give a bit more depth to the phone and then mounted it at an angle for a couple reasons...
1. if stripes are even slightly off the phone at an angle will counter balance that and make those wonky stripes not so noticeable (but I think mine stripes are straight!!!)
2. placing the phone on a angle makes it more playful and fun  ;-)

I got this done so early that I was able to get it out in the mailbox hours before the carrier came so it is already on it's way across the country. Yay!

I am still waiting on a couple new cartridges to arrive so I haven't decided exactly what I want to do for my Thanksgiving cards yet. Hopefully my new carts will arrive this week. Fingers crossed!


Sunday, August 11, 2013

Happy Halloween!

Ok, so I am a little early lol

Yesterday I was in the mood to create! Since this mood has been MIA for a while, I happily jumped at the inspiration. 

I made my Halloween cards!  Yes, it is early but usually I wait until the last minute and then don't have enough time so this is a welcome change. Let's just hope I don't misplace them before October (if you could see my art room you would know that this is a distinct possibility!!! lol)

As I stated in my last post, my Cricut has come out of retirement and is hard at work :-)


Normally when I make cards they are the traditional rectangles with images/photos. But the Hello Kitty Greetings cartridge is perfect for making die-cut cards. It actually has a 'card' button (but I didn't use that feature because for this image it would have joined her on the left side and cut off her tail). I cut out the base image and all the layers and then cut out a 'blackout' image in the same size to use for the card back.  Doesn't she make a cute Halloween cat?  Her treat bag is from the Paper Dolls Dress-up cartridge.

I shaded her lollypop (or at least I think that is what it is supposed to be) and her treat bag with Distress Inks just to give them a bit of dimension.
In this view you can see more of the back of the card. Plus, she stands up for cute display!  :-)

I want to thank Jill for her kind comments on my last post. You are so right about the catch-22. It is hard to create when you are stressed but makes you feel so much better if you do! Yesterday flew by as I played with images and cuts and just let myself have fun.

Now on to Thanksgiving!!!  :-D


Saturday, August 10, 2013

Yeah I know, I have been missing for quite a while

Between work being very stressful and home being very stressful, my creativity has gone right out the window.

To tell you how bad it really is, I spend most of my free time playing a game called Animal Crossing: New Leaf. That imaginary world is so much nicer than my real world right now that it has become a relaxing escape.

But, I think there is hope on the horizon! I am in the mood to make some holiday cards....Halloween, Thanksgiving and Christmas!  I am just trying to gather ideas and supplies before I dive in.

As I have been doing that gathering, I drug out my Cricut. I think it is such a fun tool! I tend to neglect it for long bouts (much like this blog) but when I do return to it, I play with it for several weeks (keep your fingers crossed that I do that same with the blog lol)

Did you know that college football season starts next month?! Yep! And to honor my alma mater, yesterday I created some tags.....1 for me, 1 for my sister who is a HUGE fan!  :-)  Go Bucks!!!

 
I used the Everyday Paper Dolls cartridge and cut the dolls at 3.5 inches. They are mounted on 6.25" tall tags.  For the background I used images of a Buckeye helmet with the buckeye leaf stickers and some buckeyes for the bottom. The text was added with Photoshop Elements using Yearbook font.

But I am not done with my Cricut yet.....
Today is Tucker's birthday. He would have been 21.
I wanted to play around with coloring my cuts with chalks and thought, what better subject than my sweet baby.


This cat image is from the Everyday Paper Dolls cartridge as well.....this is a really awesome cartridge jam packed with tons of cool stuff! He was cut at 3.25 inches using just a plain white index card. I then colored him with Rembrandt soft pastels. His nose and eyes are cut out. I lost the eyes (they were so teeny they just blew away) but managed to save the nose and painted it pink with acrylic paint.


I mounted him on a blue shape cut from the free Basics cartridge you receive when you download the Cricut Craft Room software. The text is cut from the Plantin Schoolbook cartridge. It is all mounted on a cream rustic deckle cut postcard I think I got from California Paper Goods years ago. (the black is just a background I used for the photo so it would show up better but I am thinking I may need to mount this on black cardstock)

Hopefully I won't be gone for so long next time. Especially since I really am trying to get all my cards started right now  :-)

Until next time.....Happy Summer!


Sunday, May 26, 2013

The Toad of Truth

Sometimes I get ideas at the oddest moments.  Last week I was watching reruns of The Big Bang Theory. Sheldon was speaking and his statement immediately brought an image to my head that I just had to create.

It was the episode The Einstein Approximation.
 
The quote:  "I need to determine where in this swamp of unbalanced formulas squatteth the toad of truth."  Sheldon Cooper
 
So, here sits the Toad of Truth. For some reason, my mind thinks he wears a monocle and top hat lol  And oddly enough, as quickly at he appeared, he has vanished. Yep. I have torn the house apart and cannot find this ATC anywhere!!!
 

I also spent some quality time with my journal this week (when I wasn't frantically searching for above toad)

The weather here has been flipping back and forth between spring and yucky cold and rainy (and forecasts of snow). I am longing for warm (not hot) days and sunshine. I was also longing to pull out the paints and brushes!

I tore a sheet out of a large, old and tattered dictionary (an awesome score at 50 cents a couple years back). It was from the B's....Bluebird to be exact.

Notice he has some bits of snow spitting all over the background because spring is struggling to keep a strong hold around here Darn It!!!

I have also been struggling lately with work, back pain, hubby's job hunt and a million other things. But this week God has been talking very loudly to me.....and I decided to listen. He really likes it when I pay attention  :-)

With all that He has been doing this week, I was inspired to create this journal spread.

The cross was drawn with a Sakura pend and then colored with Prismacolor pencils.

The background for the gate is acrylic paint as are the brick posts. The gate itself was drawn with a Sakura pen. Three of the tickets are a stamp from Tim Holtz that I colored with Prismacolor pencils then sanded. After I finished this side, I sat back and realized that even when entering heaven, we people still mess up....and litter just outside the gates of Heaven lol

I hope you all have a wonderfull week full of blessings and happiness!


Saturday, May 04, 2013

Sometimes you just have to journal it!

Life has been, to put it lightly....really sucky lately!

Thankfully, I have my art journal on hand. Over the past years, I only worked in my journal on a 'hit or miss' time frame. And very rarely did I ever use it to really work through some personal issues. Well, that changed this week. I am not going to show you the super deep and dark pages just because they are super deep and dark lol  And personal  :-)

But do have a couple page to share today (like I would show up without goodies!)

A couple weeks back I was visiting Chris on her blog Parabolic Muse. If you haven't been there you need to pop in! She is funny and creative and her blog is a great place to lift your spirits....I just can't help smiling as I read of her antics :-) While I was there, she had some mandalas that she had done. She had been inspired by Emily Lagore. So I checked out Emily's blog too. Trust me, you don't want to miss that blog either!!! Such awesome eye candy and wonderful ideas! And Mandalas!!!

What can I say, after seeing all these great mandalas by Emily and Chris, I had to give it a try. I found it to be a very calming process....much like when I Zentangle.
I was using the back of a page that had some watercolor bleed through. I love the effect. I also used my Tattered Angels glitter sprays and some stencils to add patterns and sparkle to the page.

 
And since we started a new month, Challenge 2013! had a new prompt. Asian! Now if you have been here before you know that I have tons of Asian rubber stamps and just love the look! But this challenge threw me for a couple days....the color scheme has to be Emerald (or Apple) Green, Mustard Yellow (or Gold) and Chocolate Brown. Am I the only one that doesn't think these are the normal colors we associate with Asian art? lol
 
 
Thankfully the artistic side of my brain works while I asleep. Unthankfully, it likes to get up really early on Saturdays!  Needless to say, it woke me at 5:30 am and finally dragged me out of bed at 6:30 with the constant nagging!!!  :-)
 
While still working through some of the issues bothering me right now, I created this page. The woman is from StoneHouse Stamps. They have a huge selection of awesome Asian rubber stamps!!!  The man in the background is from Tim Holtz Life's Possibilities set.
 
I washed acrylic Ceramcoat Antique Gold over the entire page (had to get that gold in there somehow lol) I stamped the faint figure of the man. The ground is torn strips of a Chinese newspaper I picked up in San Francisco over 5 years ago. I just keep tearing out bits for projects (at the rate of usage, I have at least another 10 years to go before I need another one lol) I washed Ceramcoat Brown Velvet (sorry no paints in my huge stash called Chocolate Brown lol) over the edges before gluing them all down.
The bamboo is painted with Folk Art paints Fresh Foliage and Olive Green.
 
Finally, I stamped the woman on separate paper and colored her with Prismacolor pencils....in light greens, a couple browns, some gold (and a touch of red).
 
I wanted a bit more color and depth on the background so I sponged some Distress Ink on the upper corners. (Scatterd Straw & Tea Dye)
 
The verse at the bottom is "Cast all your anxieties on him because he cares for you." 1 Peter 5:7
 
I am really pleased with how it turned out. I came out exactly as I envisioned it AND it helped me mentally with some issues.....Win Win!  :-)

BTW the kanji is from the Cricut cartridge Pagoda....which has some really great Asian images!
 

Sunday, April 14, 2013

Me again

You didn't think I would be back this soon did you? Two posts in 1 day?! Unheard of!!! :-)

I decided to try and drill some holes in the Tri-Omino. It was much easier than I expected.


I drilled a hole in the top and in the bottom and ran a pin all the way through. Just adding the beads and pin has added enough weight that the pendant hangs much better.

It looks like I need to do a bit more trimming of the wool around the edges.....enlarging these things sure does bring out the fuzzies! lol

Ok, now I am really leaving this time and heading to the flea market.  I hope you all have a wonderful day and find lots of lovely treasures to play with.

Yard Sale season has begun!

I love yard sales, flea markets and estate sales! What a great way to get out in the fresh air, rummage through piles of junk and find wonderful treasures.....for very little money!!!

I am always on the lookout for antiques and art supplies (or things I can use as art supplies).

This weekend I hit the jackpot!  We went to a sale being held at an over 55 community that was raising money for their rec center.

I found a box of really nice dominoes, a Tri-Omino game, travel Rumikub (which I had never seen before) and 2 ledgers (the pages in these things are really great for journaling and collage). I paid the total sum of $1.85!

I now have tons of game pieces to alter....WooooHoooooo!!!!!


The dominoes are a bit larger than any I have had before but are always great for pendants and magnets. They are easy to stamp or draw on. I even dyed some with left over Easter egg dye one year! They hold up great to everyday wear. I have some pendants I made 10 years ago that still look like new!

Mini Rumikub? They are at least 1/2 the size of the originals! I am thinking earrings, charms and pins.

I mentioned the ledgers above....I love adding stuff like this to journal pages!  Makes me want to get out my journal today and play around.

And finally Tri-Ominos....I had this game as a kid. I never liked it and have no idea what happened to it. My mom probably donated it or threw it out as no one ever played it. And here I am buying one!  They have triangle tiles that are hollow in the back. As I stood there debating whether I wanted to part with my 50 cents, I flipped over a tile and immediately thought 'Frame'. Now I just had to figure out what to put in all of these teeny triangle frames.

Here is my first attempt.


I needle felted the sheep on a grassy hill with a pretty blue sky. I am thinking of drilling a hole in the top and adding a jump ring to make it a pendant. Let me tell you, these things are super light-weight! I have to wonder if I will need to add a small weight behind the felt just to make them hang correctly. But so far I am liking it. Now I just need to come up with other things I can felt in this small of a space  :-)

Today I am heading to a flea market....wish me luck! :-)

Sunday, April 07, 2013

A Day at the Coast

I was on vacation this week. I was a total bum! lol

However, we did take a break from lounging around to head over to the coast for a day.  It was overcast and rained off and on but nothing can dull my spirits when I am over there.  :-)

We made a short stop in Crescent City, CA before heading up to Brookings. I managed to get a few decent photos there inbetween batches of fog lol

I turned one into a scrapbook page using Photoshop Elements. Now, I will say again, I do not scrapbook....but sometimes the mood strikes me to play with a photo so I have lots of digital goodies stored on my computer for just such occasions.

I did a lot of manipulation of the photo before I decided to add it to a scrapbook page. I lassoed and copied the gull and railing before I washed out the background (just to increase that foggy look that was already going on). I also added several overlays to give it a very aged/scratched look. I then added the gull back on top.

Once the photo was added to the scrapbook page, I used the eraser tool and some brushstroke brushes to rough up a couple of the edges.


The shell, sand dollar, plant, flying gulls and background paper are from Skys the Limit - Beachy Keen kit. The tag and button have been on my computer for over 10 years and with 2 computer changes and several system upgrades, the company name no longer shows up :-(

The water rings are brushes! 

If you have never done so, you should check out all the brushes you can download online. There are so many really cool ones...for free!  I love online freebies!!!

Hope you enjoy this glimpse of the foggy Pacific Northwest. :-)

Tuesday, April 02, 2013

Journal Challenge is back

The art journal challenge group has started back up again! I am so glad as I have not touched my journal is many many months!!!!!

It is a free group. You can check it out (and join) at Art Journaling Challenge! 2013

For April, we are making a grid and then using project scraps, leftovers or bought and never used supplies we are to take an object and portray it from various angles.

Here is my object.....one of my favorite antique kitchen gadgets.....a cast iron egg beater. I just love the shapes and lines of this thing!


We are only allowed to use primary colors plus black and white.

I painted my background squares (I hate yellow so it only shows up in the orange and green squares) and then I drew in close ups using some oil pastels that I bought years ago and have never used. (yeah like you don't have supplies that fit that catagory! lol)

With this complex item, I didn't want to try to portray the entire thing from various angles, I wanted to instead draw attention to all the little details that make up this wonderful little item.


Since this challenge is for the entire month, I may have to pick another item and try using up some of my paper scraps!  Hmm I am seeing a Warhol tribute to a biscuit cutter.  ;-)

Monday, March 25, 2013

Just Popping in to Say HI!

Spring has finally sprung which means cleaning, planting and getting out of the house!

But, I have managed to get a couple felting projects done as well.

I finished up Tucker's purse.....not that he would have ever carried a purse lol

It is about 5.5" x 5.5". It looks a little wider than tall because it is lying flat so the sides collapsed. I never carry a purse......ever.....but wanted something cute to carry my camera in. I think this fits the bill perfectly. Plus I can also fit a package of tissues. Allergy season ya know!  :-)

 
Also, this past Saturday, my friend Veronica came over to learn needle felting. We had a blast chatting and felting!
 
I forgot to get a pic of her finished project but here is mine. We made little doggie face charms. He is about 2" tall including the ears. I have no idea what I am going to do with him but I am sure eventually he will find a good home. :-) 
 

That's all for now. I am on vacation next week so hopefully I will get a chance to have some quality art time and have lots of goodies to share!

Saturday, March 16, 2013

Stab Stab Stab!

Felting is a very addictive thing! It is also very therapeutic!!!  Stabbing away at the wool, you can take out any repressed aggressions or you can just let your mind go and be free!

I get lots of ideas on Pinterest and saw a wonderful felted pendant that I decided I wanted to emulate.  I am still debating whether I need to add something to the heart itself.


And as I thought about what I wanted to create next, I had the desire to try my hand at flat needle felting (as opposed to the 3D stuff I have been doing)

I was sort of cleaning and found a couple old pairs of jeans that I had saved for a future project. Well the future finally arrived and I decided I needed a purse with something felted on the front.

It is has been a long time since I have used my beloved Tucker as a subject but I felt (no pun intended) that it was time.

I first drew an outlined of his little face.


I then traced that onto some muslin. I had some friends tell me that they use water soluble interfacing or some such thing but I didn't have any and didn't want to go buy any....I wanted to do this project with only things I had on hand. Thus the muslin.

I pinned the muslin to the denim and began blocking in colors. I forgot to take a picture of my muslin piece so here it is with his eyes almost done and the white totally complete (notice his chubby cheeks).


As I neared the edge with my felting, I removed the pin and cut away the muslin, I then felted past the muslin to hold it down and hide it completely. See the inner ear is done below but the edges are still plain muslin.
 
 
Tucker, although he looked like just white with striped areas, actually had quite a few colors in his dark spots! I blocked in the basic tan that seemed to be the underlying color of his coat.


I then pulled out 4 more browns from my wool stash to create the stripes on his head.  BTW I had to blend colors to create his eyes and inner ears as what I had was just too bright and needed to be toned down.

Here is a photo of Tucker's face. I still miss this little guy every day!


And here he is felted onto the denim.


Not quite perfect, I see too many flaws, but I am still happy with this first attempt.  :-)

I plan on sewing the purse together tomorrow so hopefully I can get some pictures posted very soon.


Thursday, March 07, 2013

Ribbit Ribbit

When I said I wanted to felt a frog I know every single one of you thought.....Yeah right! She hates frogs and all other slimy, icky things!

Well, HA!  I felted a frog!  And I still have no idea why I so desperately wanted to do so! lol

Maybe it is the hope that Spring will soon be here....or that I just really wanted to use my bright green wool.  :-)

So here is your first look at the little guy.  He is about an inch tall and 2 inches long.  As I sit here typing I am thinking I should have taken a picture of his little bright yellow belly lol (maybe later)

Trust me, he is not as blatently fuzzy as he looks......he is just blown  up much bigger than real life! But no, I still have not perfected the completely smooth look. I think my dragon came closest but he is also the largest thing I have felted which I think makes it easier to get the smooth surface.

I seemed to have caught him right in the middle of poofing out his throat. Why do they do that?


Here's hoping that Spring has almost sprung!  :-)


Friday, March 01, 2013

TaaaaDaaaaa!!!!!!

What can I say, sometimes I like to make an entrance! lol
 
It has been quite a while since I have posted anything. I apologize. Between work and health issues I just haven't been in the mood. Not serious health issues....the normal back, neck and I added almost total lack of use of my right shoulder issues. But, I am back and my shoulder is almost pain free....Yay!
 
So, although I have been gone, I have not been a total bum. I struggled to find ideas and my creativity seemed to have totally flown the coop.
That is until I found this adorable book....Collage Couture Techniques for Creating Fashionable Art by Julie Nutting. It totally jumpstarted my creative juices! I have been scribbling in my sketchbook and jotting ideas for many areas I like to play in.
 
But I did actually apply some of her techniques and created a couple works.
 
Here is a page in my art journal. My first attempt at "fashion" design. I just love a day at the beach!
 

I did a watercolor wash over the entire page. Then, using colored pencils, I added the lighthouse and rocks. Next came white acrylic waves. I needed some balance on the left so out came the rubber stamps!  And finally, the techiques from the book, creating the model and her wardrobe.

I had a blast with this and really want to create more! But, just as in real life, I am finding I have no fashion sense on paper either lol

Here is my second fashion model.


I created this one on a canvas that had been taking up shelf space. Using various paints and papers, I collaged the background.
I created my model and her clothing using some of my favorite colors. And finally stamped the Hans Christian Anderson quote down the right side.

But, as I said, this got my creativity back on track and I was able (once my shoulder stopped hurting) to get back to some needle felting.
 
Say hello to St Nick.


He is made entirely of wool other than his alpaca sack and wood staff.  He only stands about 6 inches high.

 
I am very happy with how his face turned out. I really did not want to use glass or plastic beads or eyes and so I felted his eyes in a lovely shade of blue. They are even more intense in person. Like he knows if you have been naughty or nice!  ;-)
 
 
Well, that is all I have done for now but there is a small green frog begging to be released from my brain so hopefully he will begin to make an appearance this weekend. :-)